Ways To Work It Wednesday - Easy Mini Albums
Hey Hey! It’s Ways to Work it Wednesday, the day we bring you an article on how to take something “ordinary” and turn it into something extraordinary!
Do you love mini albums?! Well I've got 4 gorgeous examples of beautiful and EASY mini albums up on the blog for you today and you're going to be so inspired by the team's creativity and the ease of putting these together!

Cathy - Sunkissed
I’ve been making mini albums for friends and family for years. A mini album is a great way to document an event or a vacation or even a person. Often, it’s overwhelming because you don’t know where to start. However, they can be really easy if you simplify your process. I absolutely love simple and sweet projects especially little albums that make for such meaningful gifts!

This mini album is 4’x6”, a standard photo size. The idea is that you can get the bones of your album super fast by combining 4x6” journal cards and also 4”x6” photos. One of the best things about Traci Reed’s digital kits is that everything you need to embellish a mini album is included. I have used the Sunkissed collection to help celebrate some of the moments of Summer that I don’t want to forget. I printed the journal cards and stickers on my home printer and got to work.

There’s lots of ways you can put the album together but I usually use the binder rings with some threads or ribbons laying around is my favourite. Bottom line is – don’t get overwhelmed with mini albums because you can bring a project together pretty fast if you use this quick method especially with products like the Sunkissed collection that already has everything you need!

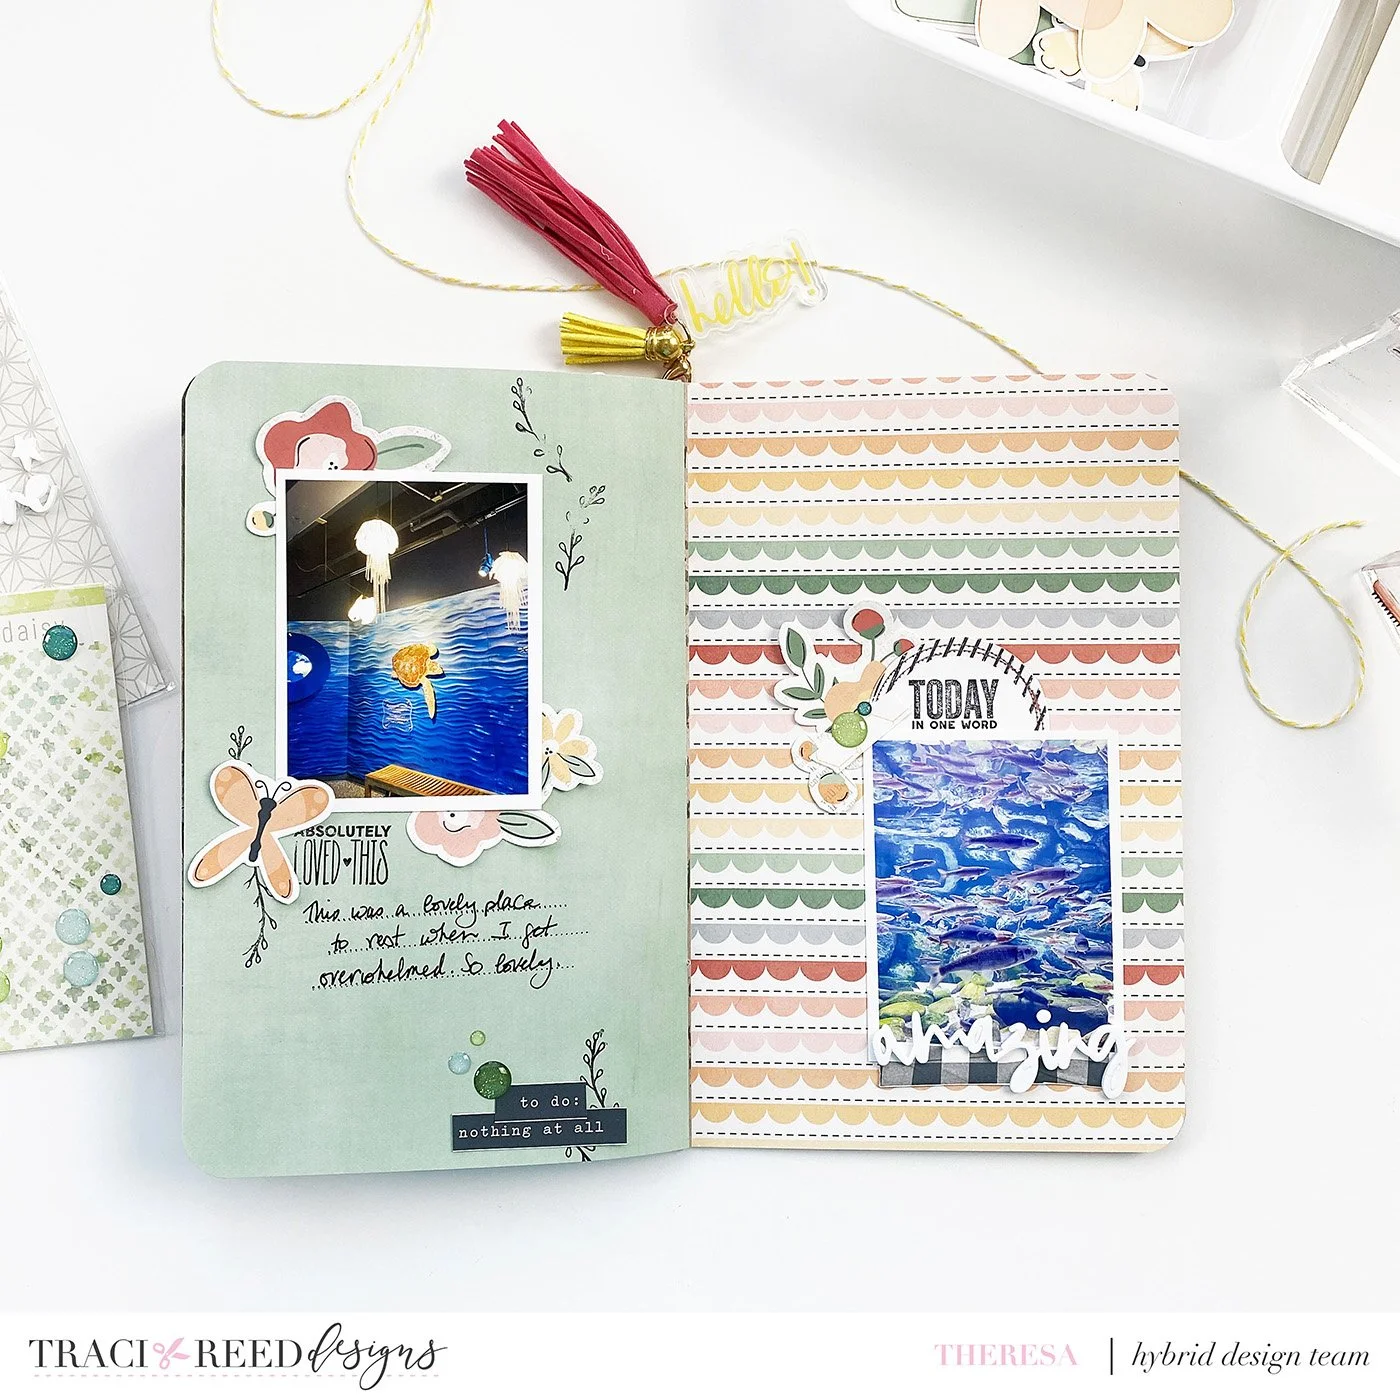
Theresa - On The Go & Going Slow
Recently my husband and I took a couple’s weekend away to Atlantic Beach, NC. One of the highlights of our trip was a visit to the Aquarium, and in an effort to get more photos into my albums I decided a flat mini would be a great way to accomplish just that! This album started with printing all the pages back to back using patterned papers from On The Go & Going Slow. This kit is perfect for summer travels!

I have printed five sheets back to back, plus a vellum which also uses two patterned papers from the collections. Printing back to back can be a little bit tricky, but you can set it all up in Photoshop or Canva the way you want it, and then rearrange it to print properly. And mine didn’t all come out quite the way I planned (ha!) but I rolled with it and had fun anyway. Of course, you can also print your papers randomly too – there’s a lot of fun in that!

Once all the papers were printed and folded, I sewed them into place and added my little charm (Vicki Boutin). I also added the sequin label holder on the front – because who doesn’t need sequins on their cover? That is adhered with a glue gun to keep it secure.

After all that, then you can add your photos + stories + embellishments! I’ve printed my photos in a variety of different ways, mostly just so they easily fit onto 4x6 photo paper. I glued them into each layout and then added embellishments using a bit of a formula. I’ve tucked florals behind the photos, stamped directly onto papers, and kept dimensional embellishments to a minimum. The enamel dots, foam title words, and stamps are all Cocoa Daisy.

Also, did you notice the sequin pocket?! That is also from Cocoa Daisy, with sequins from Clique Kits. Now this little gem is ready to be tucked into my regular Project Life album to remember forever!

Complete Album


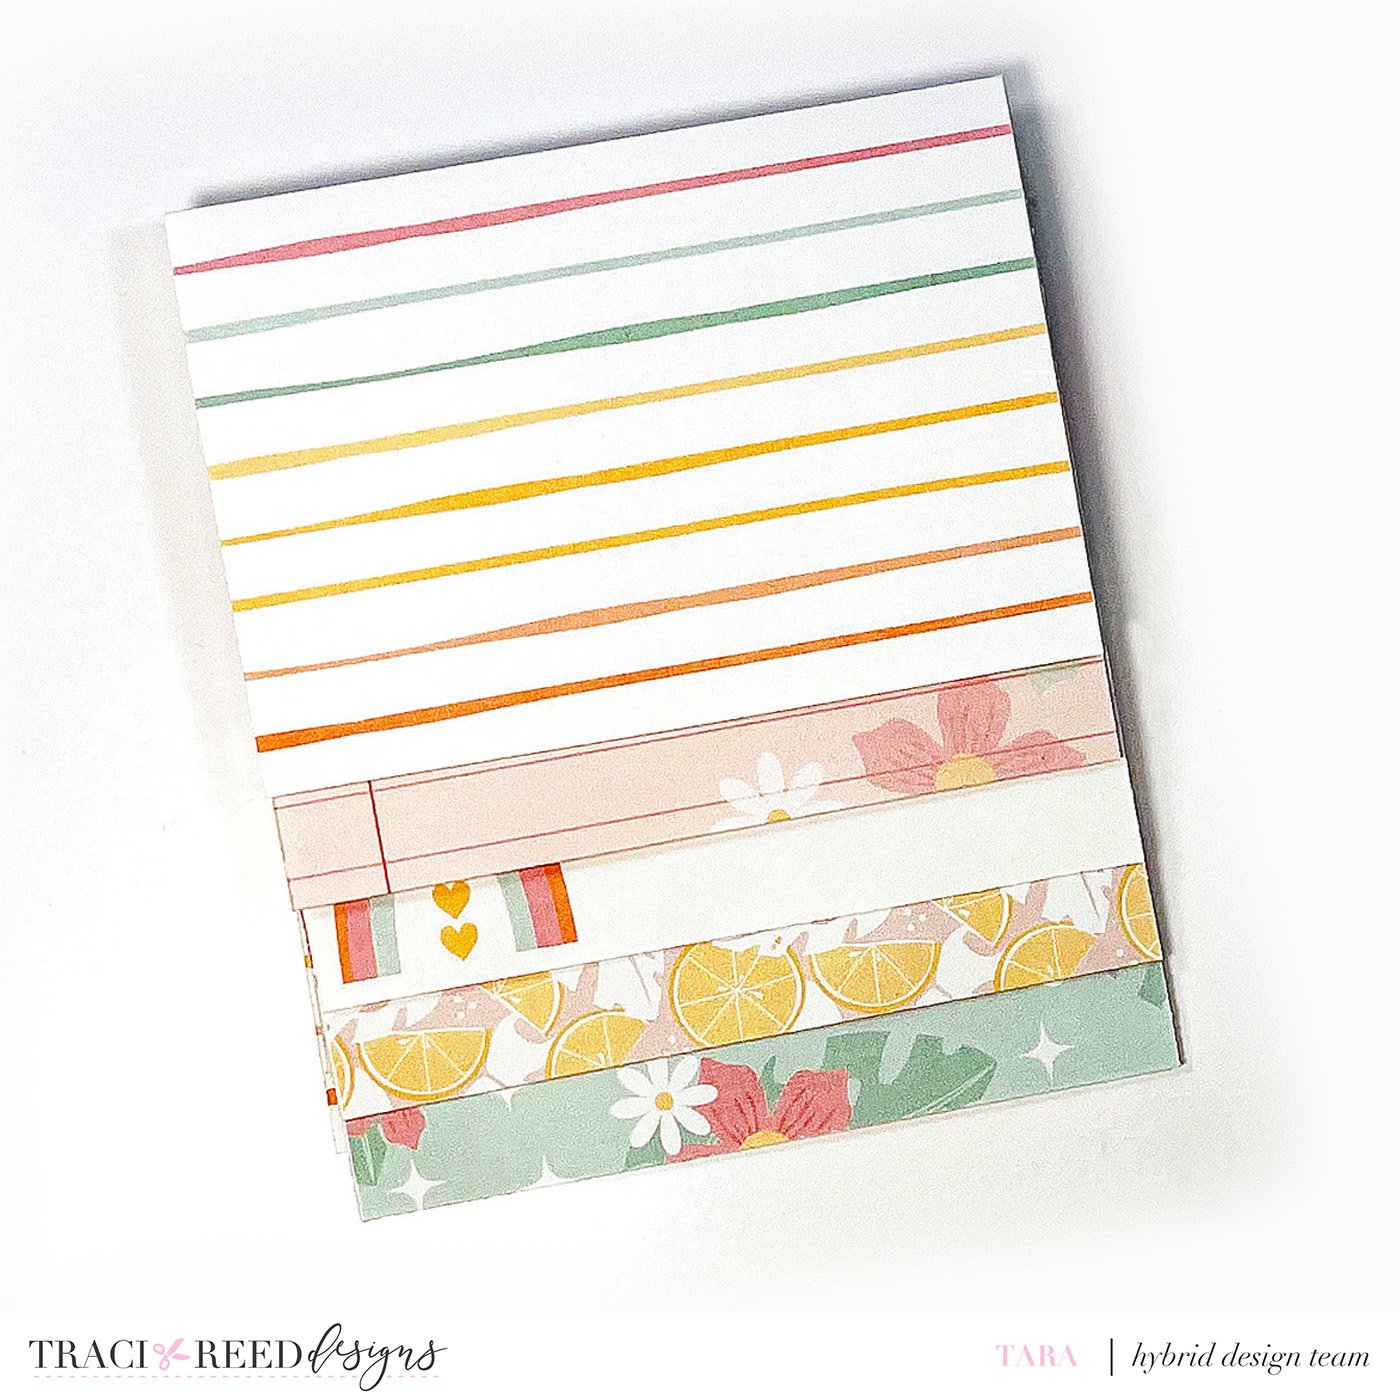
Tara - Sunkissed
Hey everyone, it’s Tara with @secretbees_studio. I’m here today with a tutorial on how to make a super simple but super adorable mini album using the gorgeous new Sunkissed collection Traveler Notebook Signatures! We all know the best part of making a mini is the decorating and embellishing of the pages and this super easy album lets you get to that part in just a short time!

I printed matching TN Signatures on both sides of my paper as shown in the photo. The printing matched up very evenly on both sides so I had just a bit of trimming to do. My pages ended up being 4.25” by 7.875” and I used 5 pages in total.

After deciding on the order of the pages, I started with the top or front page and scored it on the long side at 3”. The second page was scored the same way at 3.5”, the third page at 4”, the fourth page at 4.5” and the fifth and final page at 5”. Each page was then folded and stacked inside each other so there is 1/2’ showing below the top page as shown in the photo.
After stacking the pages tightly and evenly, I then used my crop-o-dile to punch two holes at the top making sure to punch below the fold on all of the pages. I ended up using the larger hole of the crop-o-dile to accommodate the ring binder I was using. And that is the base completed for your mini!

I then printed journal cards and 3x4 patterned cards to use as photo mats and page decorations along with the beautiful Sunkissed collection stickers to use as embellishments for my cover and pages! Since some of the pages are fairly small, I used printed 2x2 photos which leaves plenty of room for layering of stickers and journaling spots!


Mini albums are so great to document an occasion in a short and sweet way. This mini may be small but shown here it has 18 pages, besides the covers, for lots of photos and/or journaling! It’s also a great hand-held size too and so easy to make you will want one for yourself and your friends!

Stacy - Anywhere But Here
When I travel, I usually pack notebook paper and a pen inside of a 12x12 plastic envelope. I save maps, brochures, tickets etc in the envelope and use the paper for journaling. At the end of the day, I take 15 or 20 minutes to write down all the details I remember… where we went, what we ate, any activities, a very detailed account so that I can document the stories when I’m ready to scrapbook.
I’m going on a short weekend cruise with my daughter, son-in-law and some of his family this month and wanted to try a different approach. I have a small notebook, a mini HP printer for photos and I have printed out some of Traci’s “Anywhere But Here” journaling cards and stickers to put inside. I’ll add some washi tape and a few different colored pens and be able to write those stories in the moment AND add a few cute pictures, too.

My plan for the outside of the mini-album is to set up a file in Photoshop for the size of the entire cover and use a blue patterned paper from the kit. I’ll add alphas for “Bahamas Cruise 2022” where it will fit on the right side and print it out on sticker paper to make it easier to adhere. Then I’ll stick it down carefully (making sure the album will fold appropriately) and trim the edges to fit.
