Tutorial: Make a Hexagon with Star Cut Out in Silhouette Studio with Traci!
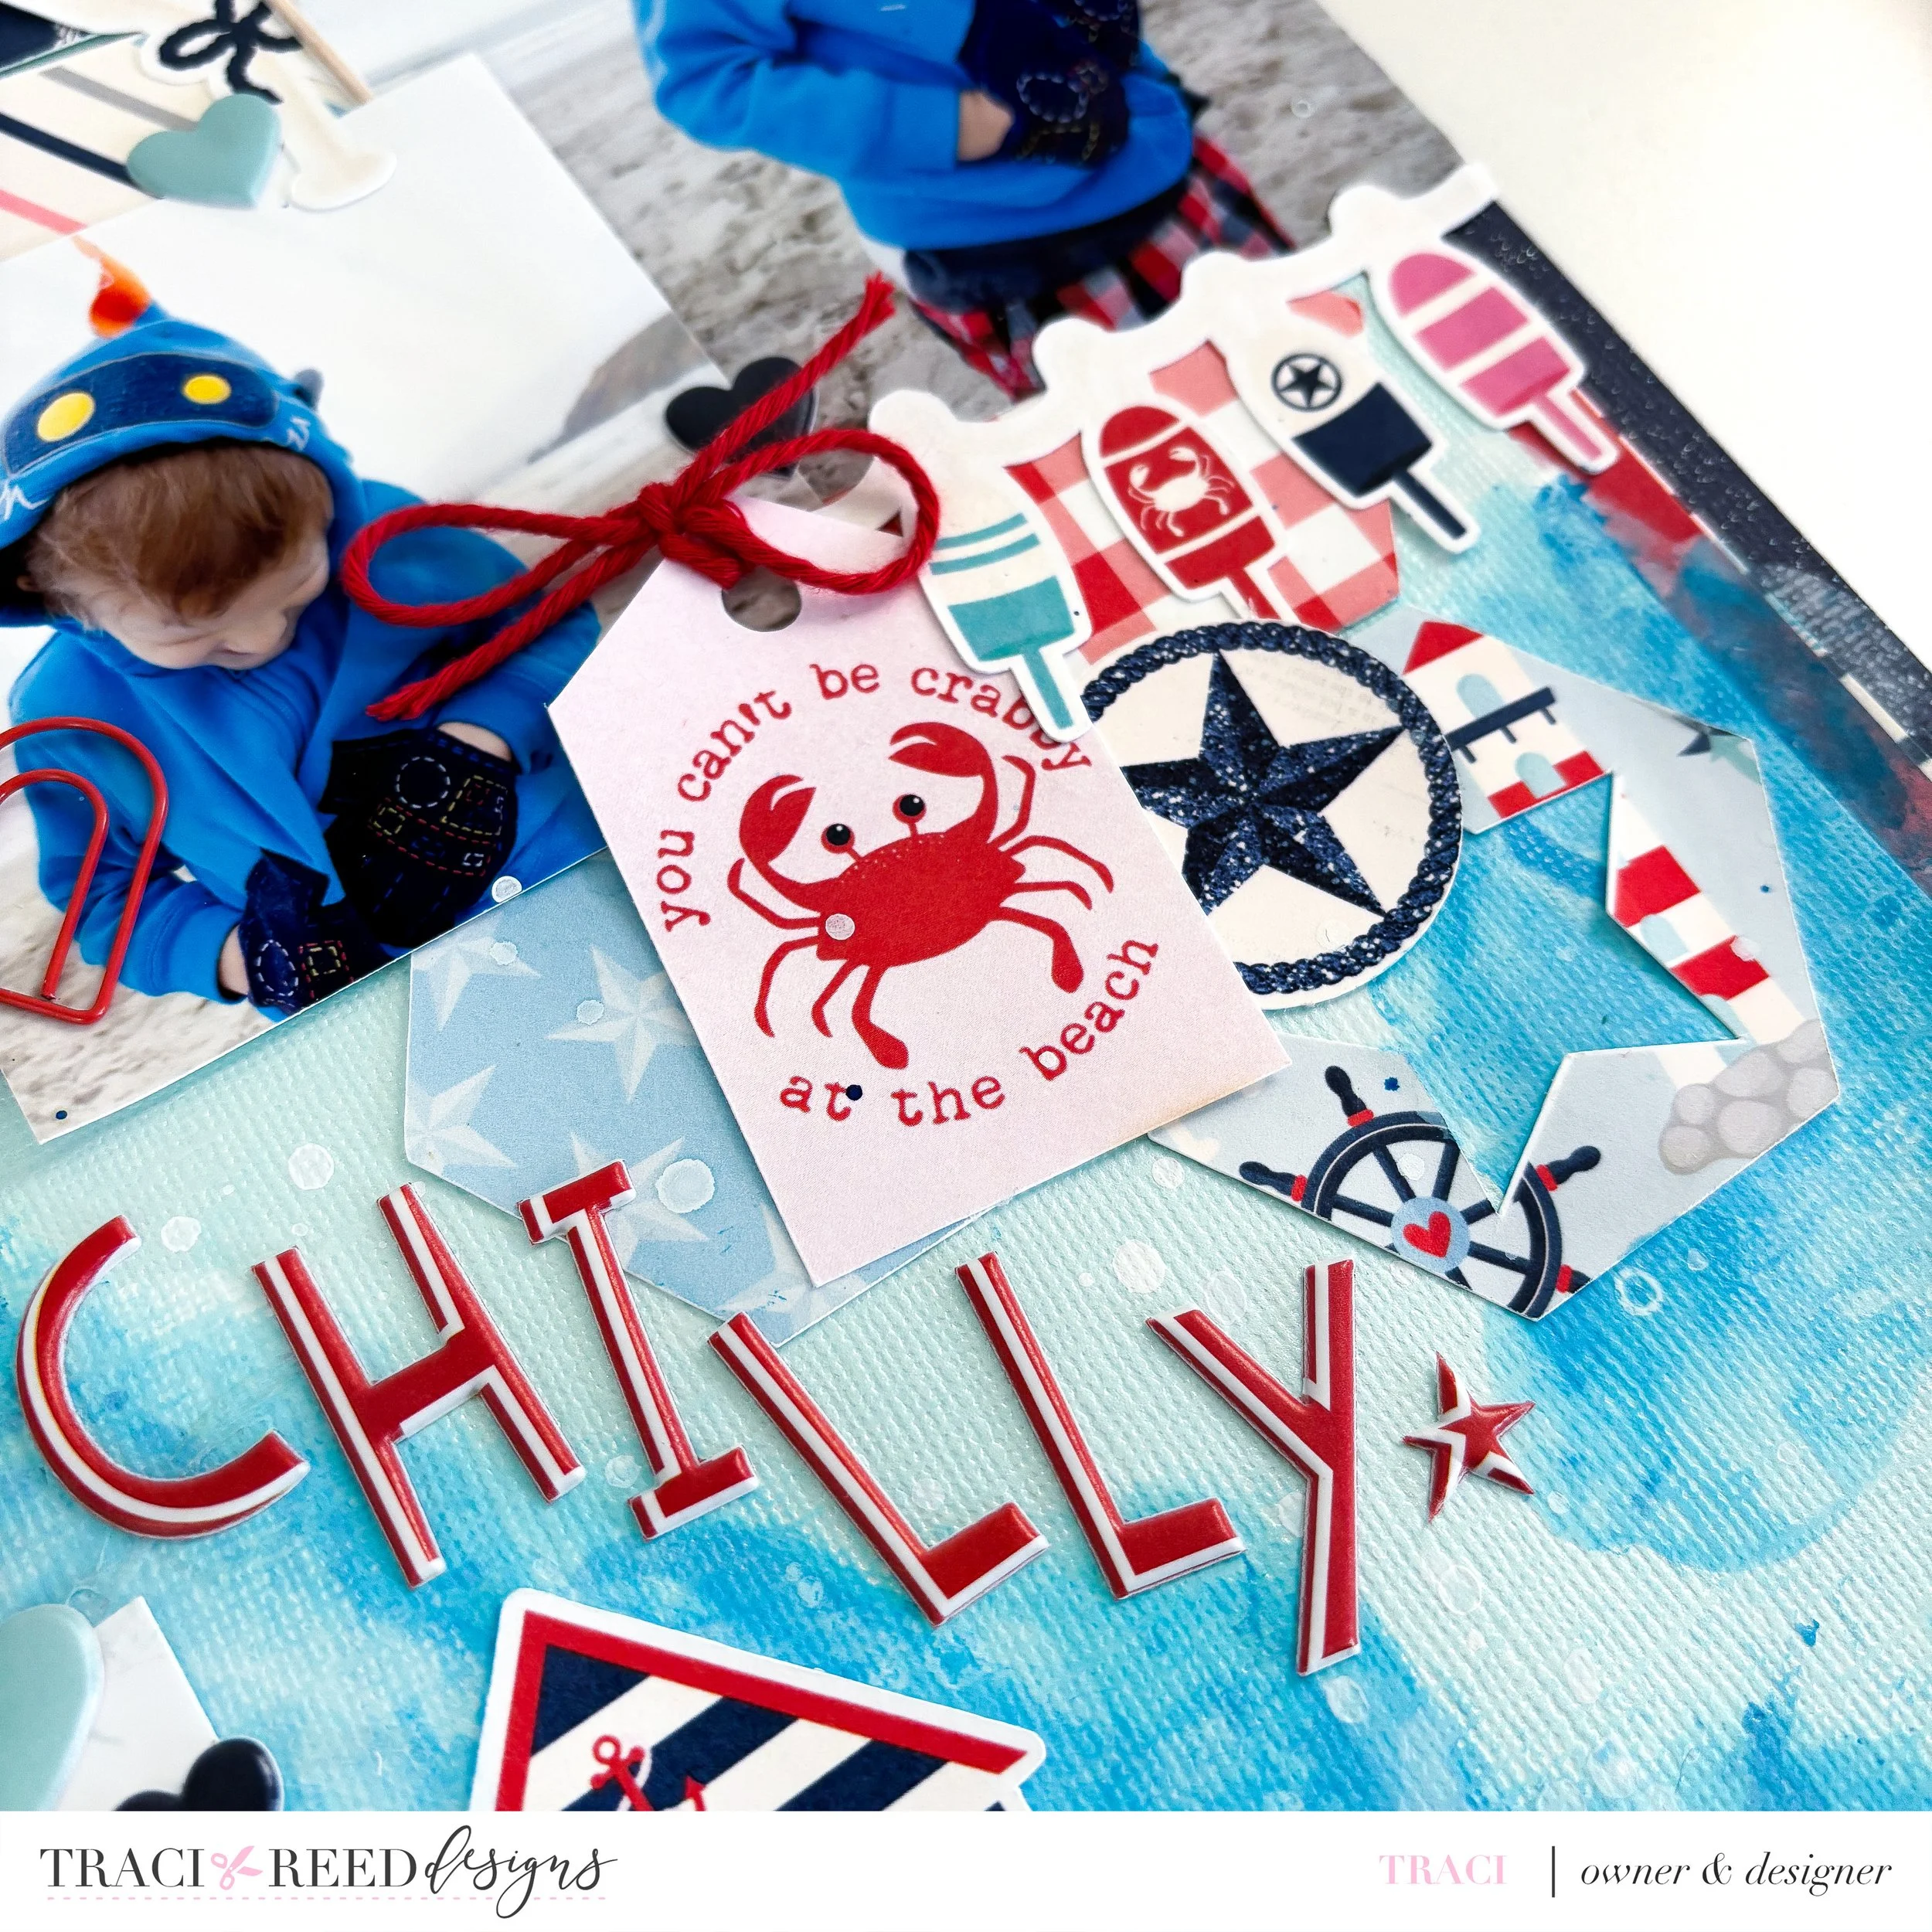
In my recent layout using the True North collection, I created these darling hexagons with star cut outs for my page and I loved them so much, I wanted to create a tutorial for you for Silhouette Studio rather than how I did it in Photoshop since Silhouette Studio is a more accessible (read: free) program.
Little did I know, there is no custom shape for a star in Silhouette Studio. 😱

WHY is it so hard to draw a star in Silhouette Studio? Why isn’t it one of the custom shapes?! Well, you CAN draw a star in Silhouette Studio, and I suggest that once you do this tutorial, you save the shape to your library so you never have to do it again!
It’s worth it though…look how cute!

How to Create a Hexagon with Star Cut Out in Silhouette Studio
First, let’s draw the easy shape…the hexagon. Using the Polygon tool, hold down alt while clicking and dragging your shape so that it doesn’t come out at an awkward angle


Now drag the slider to make it a hexagon rather than a pentagon…easy!

Repeat the process to create another pentagon

Now comes the fun part: Duplicate and mirror the pentagon by holding down shift + alt (or option on a Mac) and hitting the down arrow. This will mirror and perfectly align the new pentagon at the bottom edge of the previous pentagon.
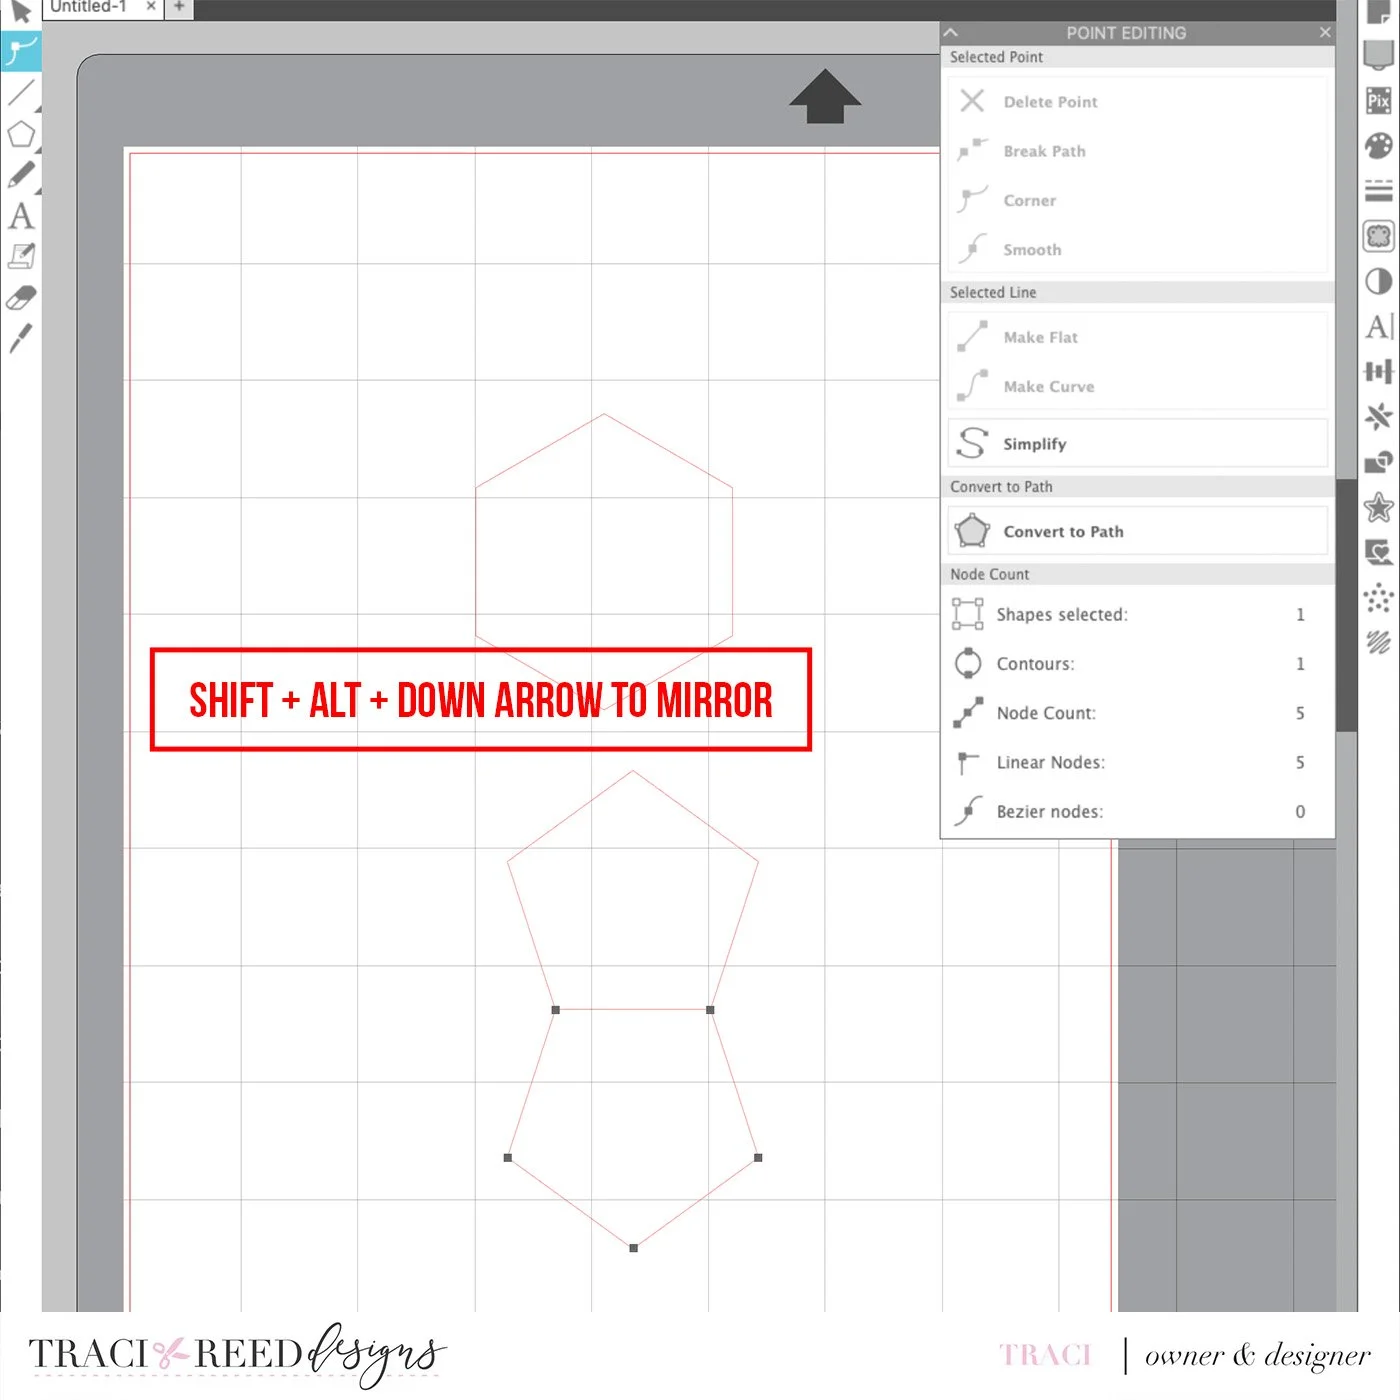
Select both pentagons and right click to convert to path (I could have done this at the outset with the first pentagon, but I forgot so I did it with both 😂)

Now, using the point editor, delete the two outside points of the bottom hexagon to form a triangle

Select both the pentagon and the triangle and rotate 72 degrees

Select the original pentagon and repeat the mirroring and point deletion process to create another triangle.

Select all three shapes and rotate 72 degrees again.

Repeat until you have all 5 star points

Select all shapes and in the offset panel, offset the shape with sharp corners by .02 in

With all shapes selected, including the new offset star, right click and hit weld

You now have a perfect solid star!

Rotate the star 72 degrees to make it straight, then resize and center within hexagon

Right click and hit “make compound path” to make this one solid shape

Now you can add your pattern!
Drag and drop the patterned paper you want the shape to be filled with from your files directly into the hexagon. I prefer using the 3x4 patterned cards because it reduces the pattern much less

You can resize the pattern in the fill>pattern dialogue box, I increased it to 150%

And there we go! You can duplicate this hexagon and fill it with as many patterns as you want to print and cut!
Check out the process video for this layout:
True North Collection


