Inky Ideas with Evy - DIY Traveler's Notebook Box!

Hello creative friends!
New year means new projects, new good intentions but above all many new collections coming out with which to have fun! Every year, I choose a guiding word for the creative projects of the year (and of my life in general) and when I saw this new collection of Traci (and its name!) the choice was simple. RENEWAL is my word for 2023!

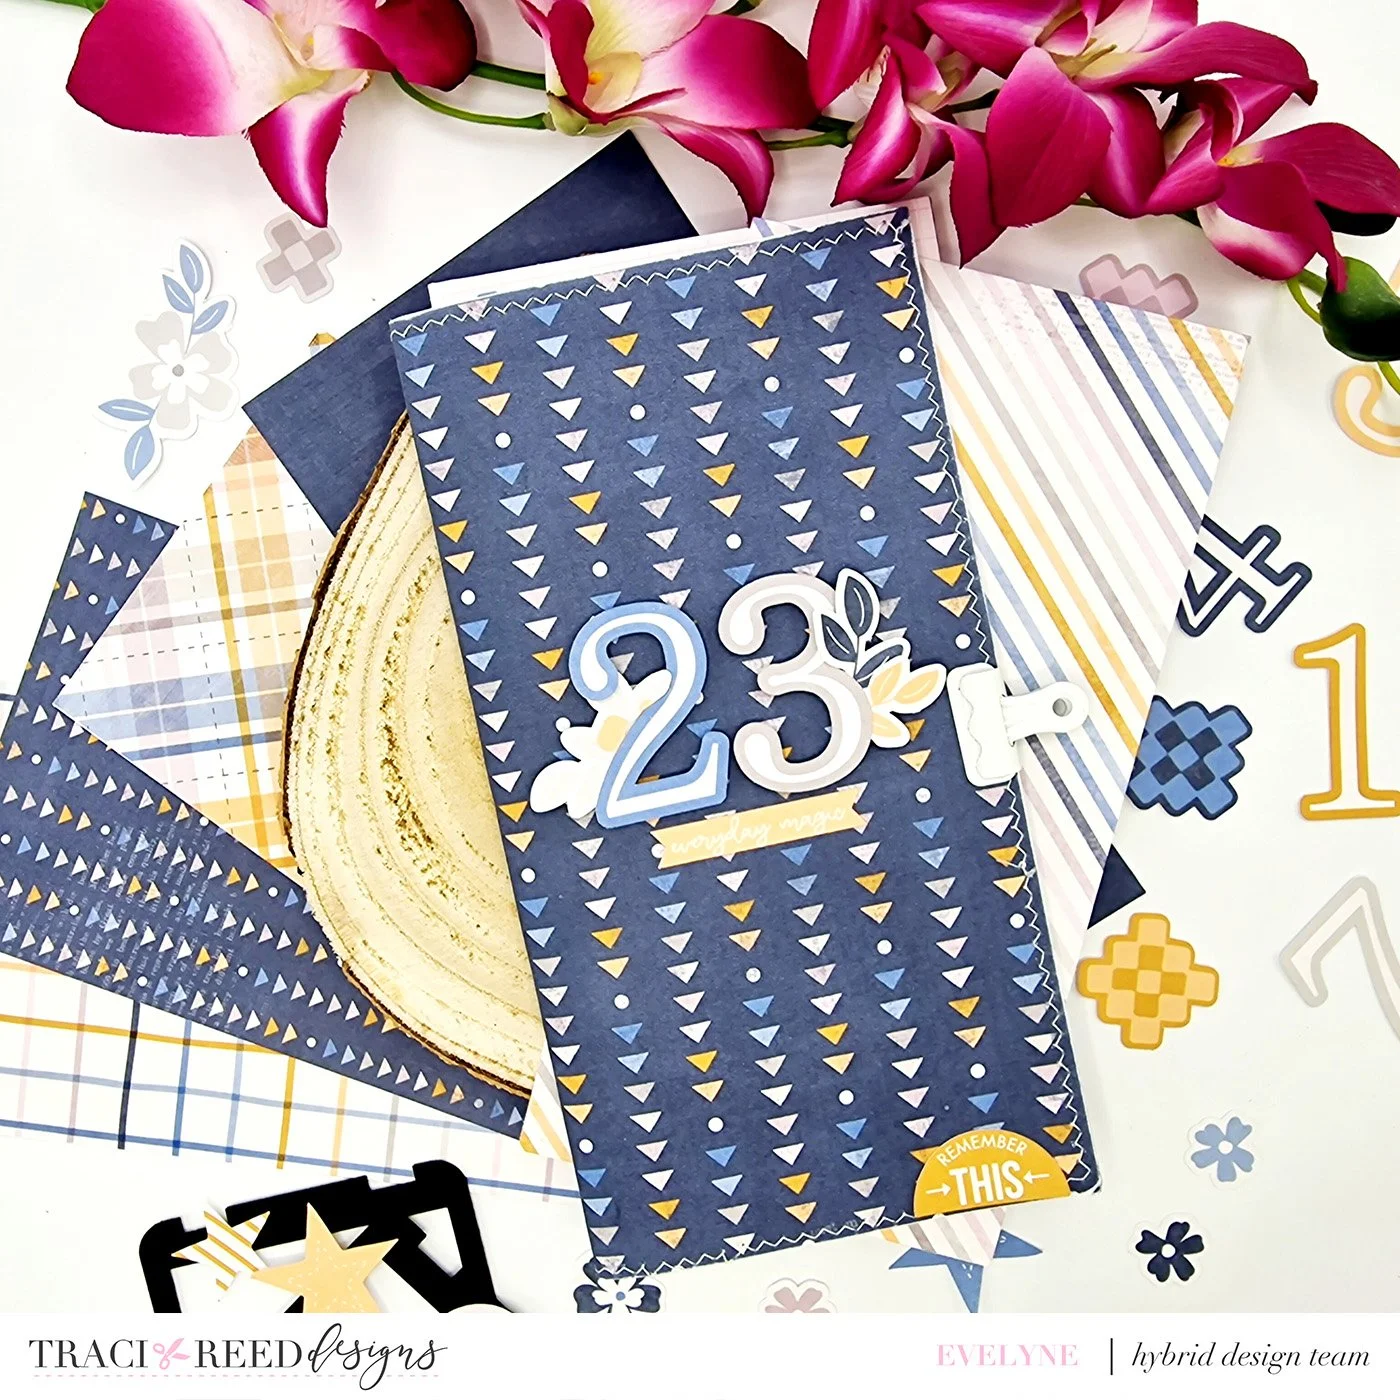
I have also chosen which projects to focus on for 2023 and obviously the Traveler-notebook is one of those that cannot be missed. So I thought of replicating an idea of 2022 also for this year and create my TN and a matching box where to store it. I like the fact that I see in my scrap room a series of projects that continues (and that was completely created by me). And here they are together, version 2022 and 2023.

For both boxes I used a 1.5 mm card stock and covered with patterned papers from the collection. I played with the thicknesses by putting a wooden frame and playing with embellishments. I covered the inside of the frame with a pocket card and then I had fun printing stickers on cardstock and playing mixing flowers, twigs and writings!

Obviously I also created the TN that will accompany me in this 2023, I chose a very simple cover but with a patterned with strong colors, it is one of my favorites of this collection!
I love the result, it gives me a lot of positive vibes, I have already printed some internal pages to start using it immediately!
I hope I have given you an idea to store your travelers-notebook and I wish you many new projects in 2023.
Xoxo,
Evy
Regular Size Traveler’s Notebook Box Tutorial
To create our box we need:
1 sheet of heavy chipboard (1.5/2 mm chipboard) , preferably all black or all white even inside
Tacky glue, block glue or a strong glue
Corner guides (optional)
Glue eraser (optional)
We cut the chipboard in the following sizes:
2pcs 8 ½ x 4 ¾ ( 21,5X12cm)
1pc 8 ½ x 1 ¼ (21,5x3cm)
2pcs 4 ¾ x 1 ¼ (12x3cm)

Let's prepare glue, corner guides or alternatively a t-ruler and let's get started!

Using the guides for the corners or simply a T-ruler we glue the 8 ½ x 1 ¼ piece creating a 90 degree angle.

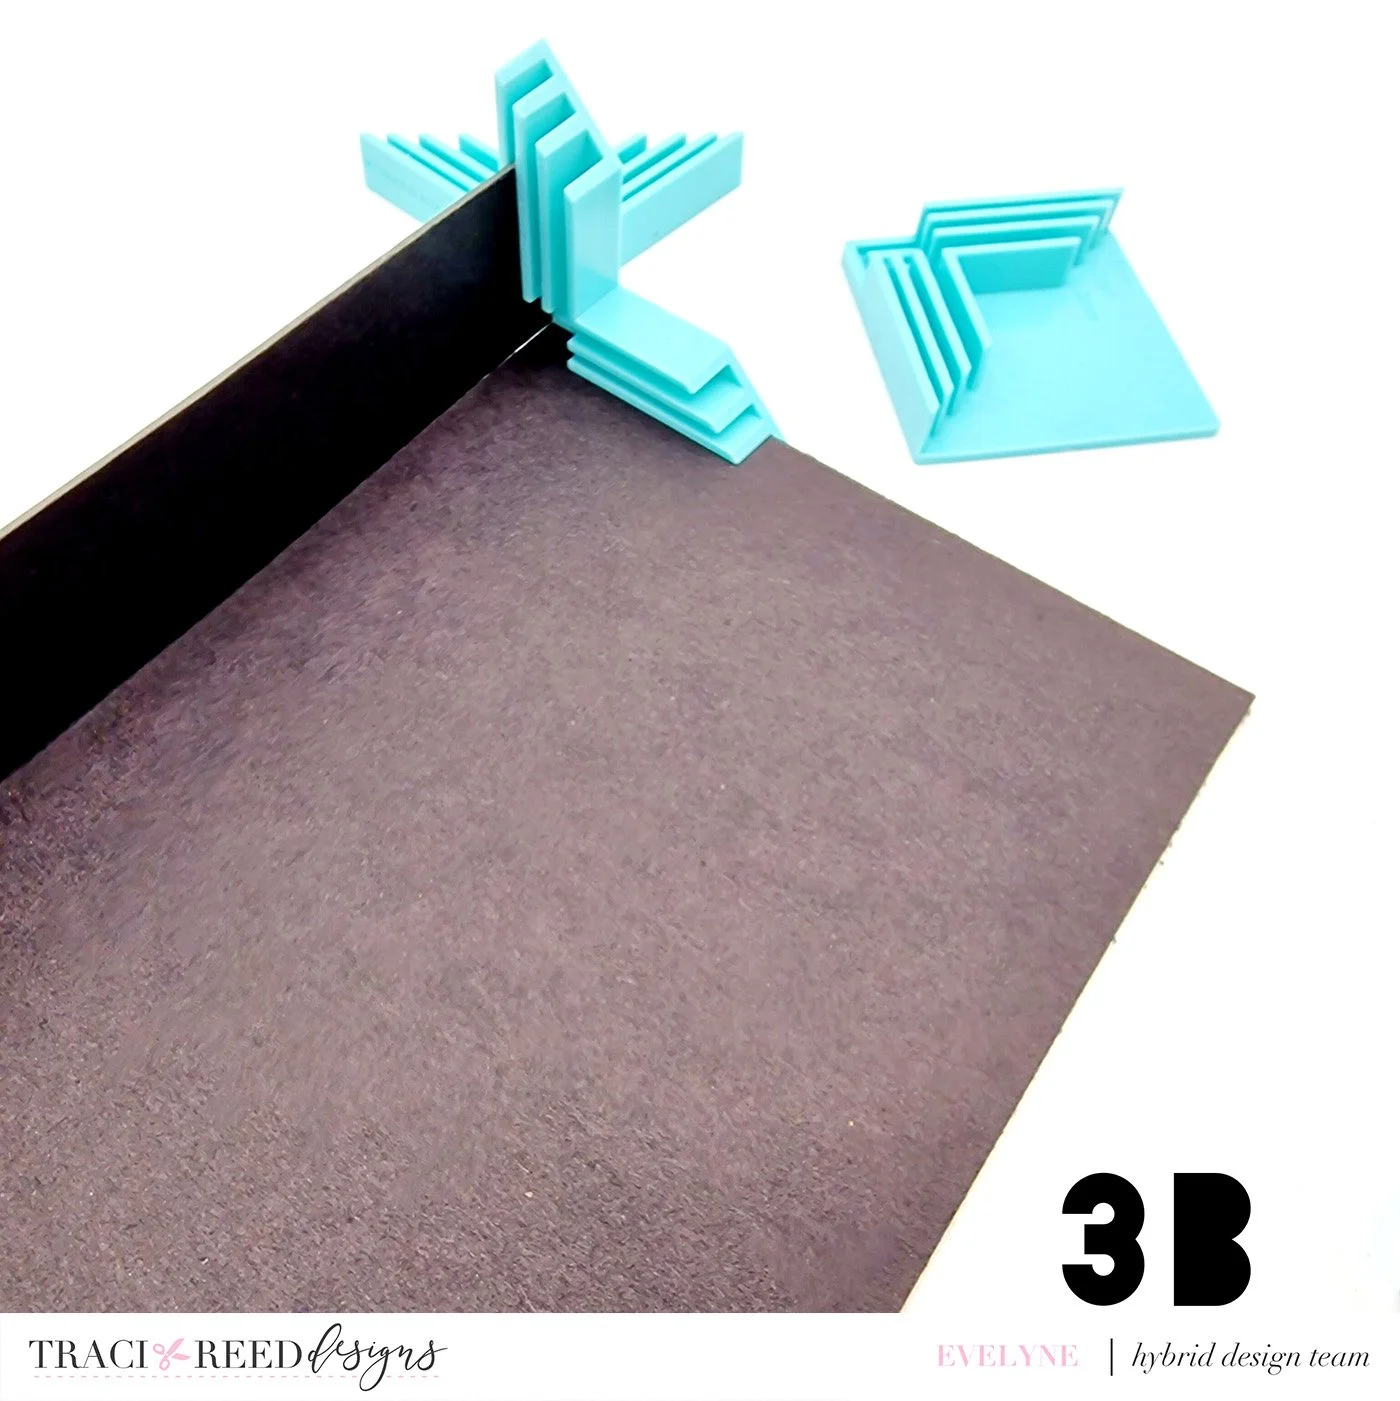
We do the same operation with the second piece, we can help us in gluing by inserting something inside the box until the glue is dry.


Now we move on to the top and bottom of the box, it is the simplest part, just put the glue on the edges and rest


Don’t worry if you have any glue residue or some imperfection, I help myself with the glue eraser and a cardboard nail file to remove defects.

TIPS: If you have used an uncolored chipboard you can color your box with acrylic paints before coating it!
The box is ready, you just have to cover it and decorate it to your liking!

TRD Product Used In This Post

